Two years ago Vikkie Chen published an excellent article on
formatting your thesis in InDesign. This piece is a supplement which explains the automation of tables of contents and lists of figures. Updating these two sections with each draft is a tedious exercise, one that computers are perfectly capable of automating. As a side benefit, generating tables automatically creates hyperlinks in the resulting PDF file for easy navigation.
Let’s jump in.
Table of Contents
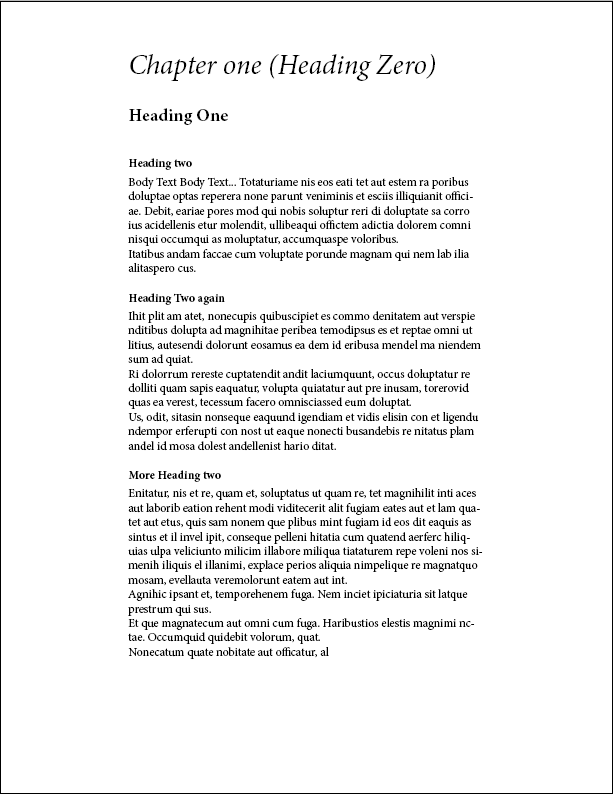
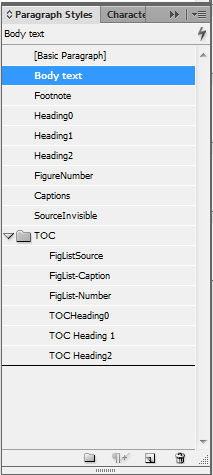
By using paragraph styles and Indesign’s Table of Contents tool we can generate the table automatically. To use this technique you will need to apply consistent paragraph styles to your titles so Indesign can sort through them. I typically label mine Heading1, Heading2, Heading3… in decreasing order of size. This example list of paragraph styles will cover everything we need in this guide.
Here is an example of paragraph style hierarchy on a page.
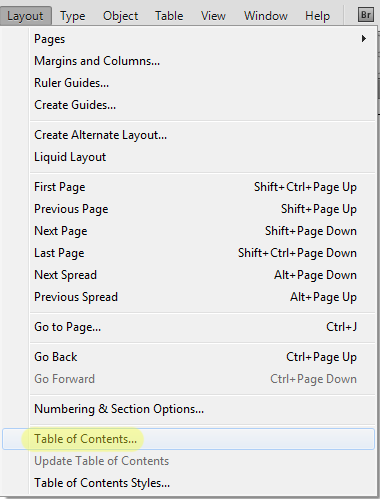
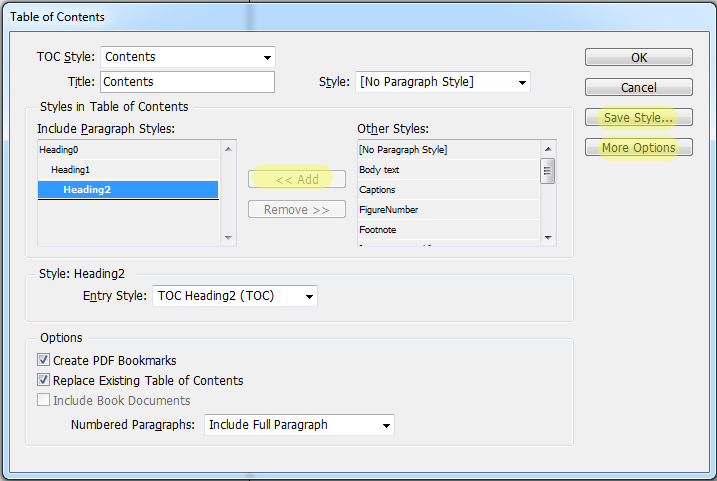
Let’s generate a Table of Contents. Head to the menu-> Layout then Table of Contents…
The interface is a little clunky, but it is worth the effort. Add all your relevant heading types, and have fun customising their appearance with more paragraph styles and numbering options. I like to create a separate collection of paragraph styles for the table of contents so everything can be clean and aligned. Remember to save your settings, as indesign will forget them once the dialog box is closed.
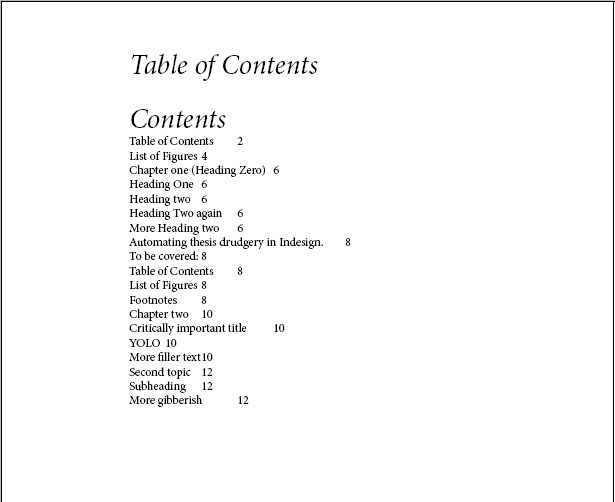
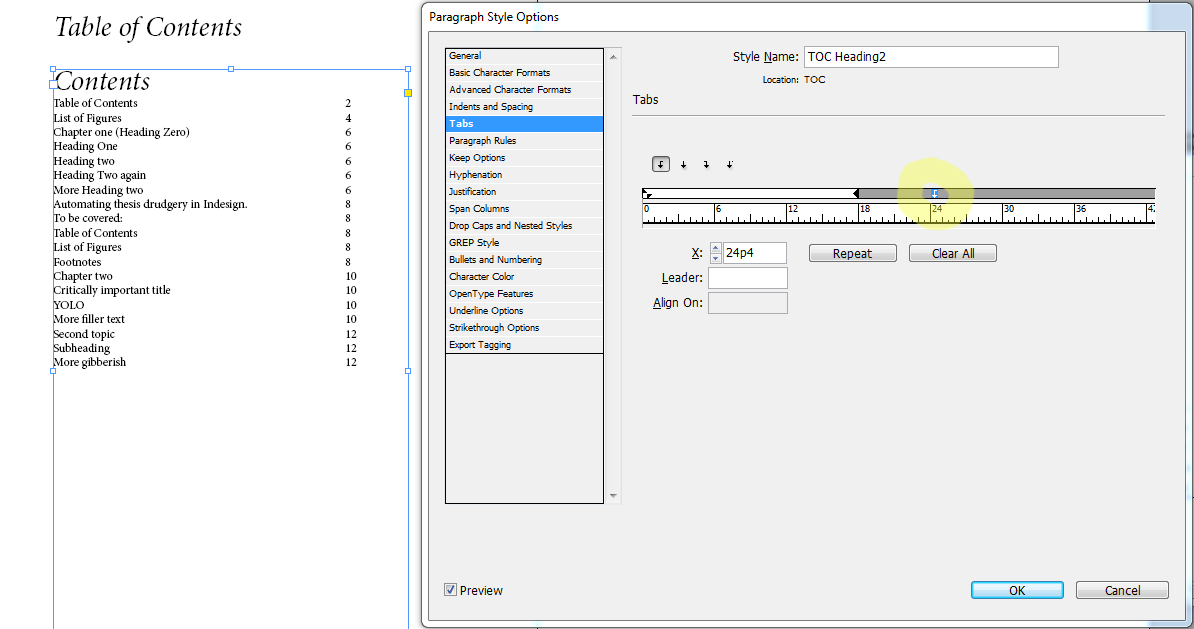
Now the list is fairly messy. Let’s add a Tab to their paragraph style to align the page numbers, and give them some size.
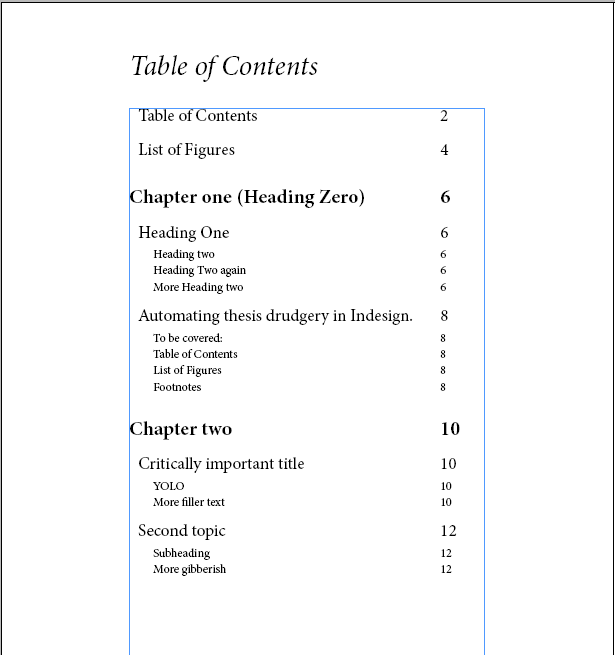
With some time spent designing paragraph styles for the table of contents you can create hierarchy.
The table of contents is now looking great. Anytime you re-arrange pages or add a title, you select the table of contents text box, go to the Layout menu and choose Update Table of Contents.
When exporting your swanky new thesis, you can check Hyperlinks in the export settings to make the table of contents clickable.
List of Figures
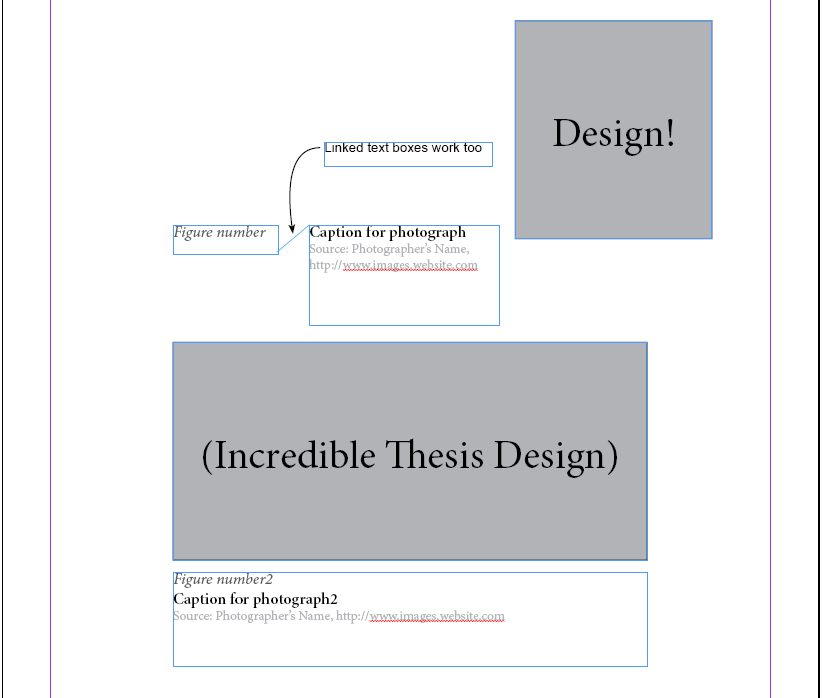
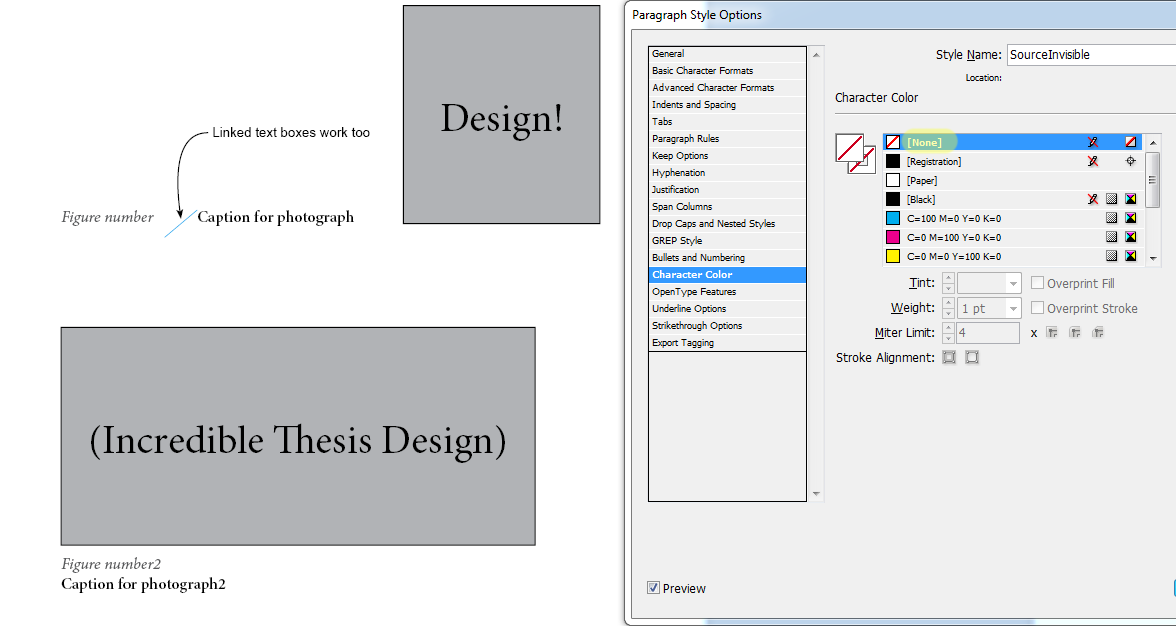
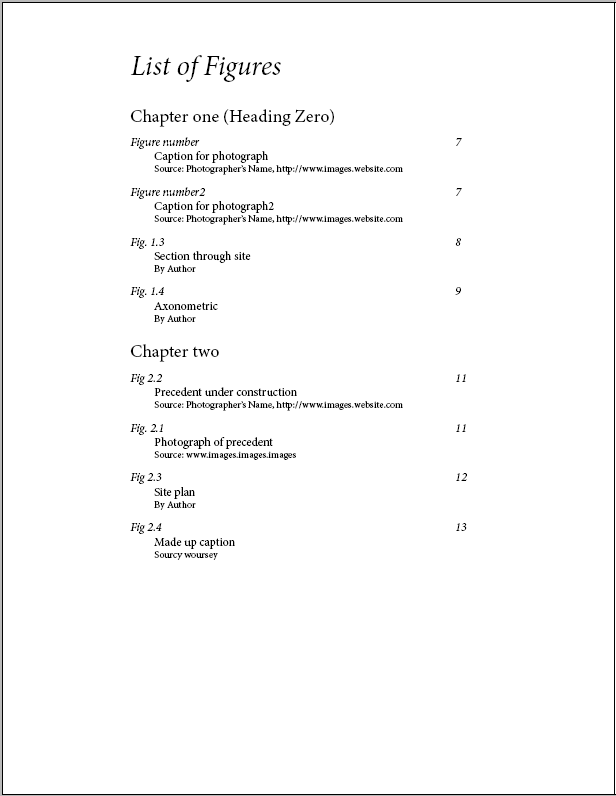
We can create a List of Figures using the same Table of Contents tool and a little sneakiness. By placing image sources in the captions throughout the text we can gather them together using the table of contents. The great benefit of this method is that the source follows the image around as you reorganise your document. By adding sources incrementally alongside images there is no need for a last minute scramble to cite them. After shifting things in the thesis you will have to manually set the figure number (Fig 1.2, 1.3, 1.4…) in each caption. When it comes time to publish a draft, pop into the paragraph styles for your sources and set the character colour to paper, making them invisible.
And after setting the colour to paper
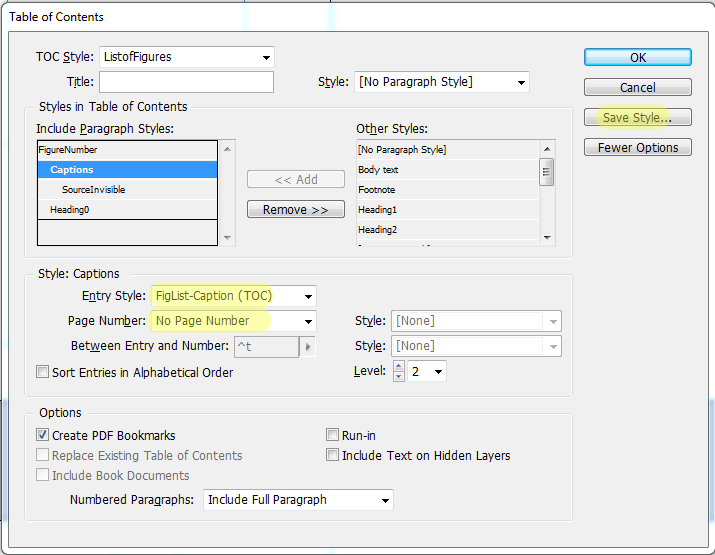
Once you have paragraph styles for Figure Number, Caption and Source, let’s create a Table of Contents.
You can pull in your chapter titles to give order to the list. Each paragraph style has the option of a page number before the text, after, or not at all. I disabled page numbers on everything but the Figure number. Don’t forget to save your Table of Contents settings so they are not lost. Again, creating separate styles to appear in the figure list gives you control over appearance. You will need to set Tabs to make all the elements align nicely.
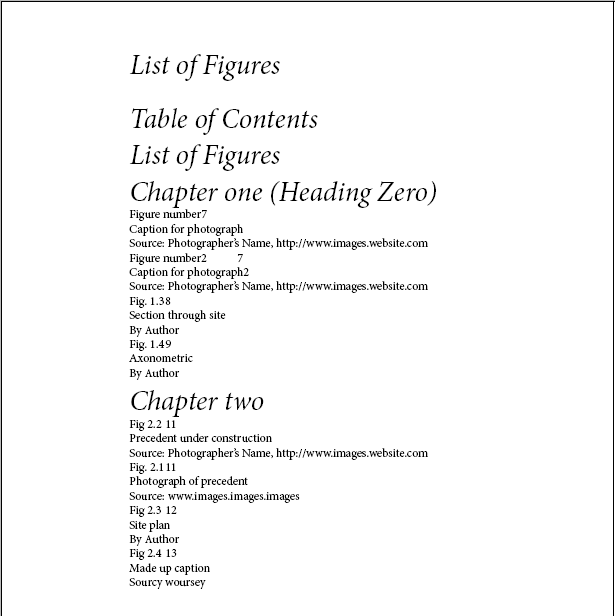
Here is the resulting List of Figures. You will never have to edit it again, just go to Layout – Update Table of Contents and let a machine do the work.
Some designs for a list of figures are not fully automatable, such as having the figure number in line with a caption. In that case you could perform some post-production by removing the line break between them manually.
Going forward, you will have to make sure all the captions are correct and properly numbered, and Indesign will do the work of assembling your list of figures.
If you have multiple captions on the same page there is a chance Indesign will order them backwards. Fig1.3 will come before Fig1.2. To fix this you will need to flow the text boxes together, when they are one continuous piece of text Indesign will get it right. Throw in a Frame Break (shift-numberpadEnter) at the end of each source before linking the boxes so they don’t reflow text into each other.
Footnotes
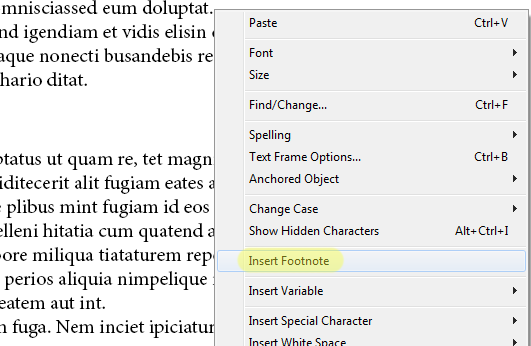
Indesign also does really nice footnotes. You create them by right clicking in text and choosing create footnote.
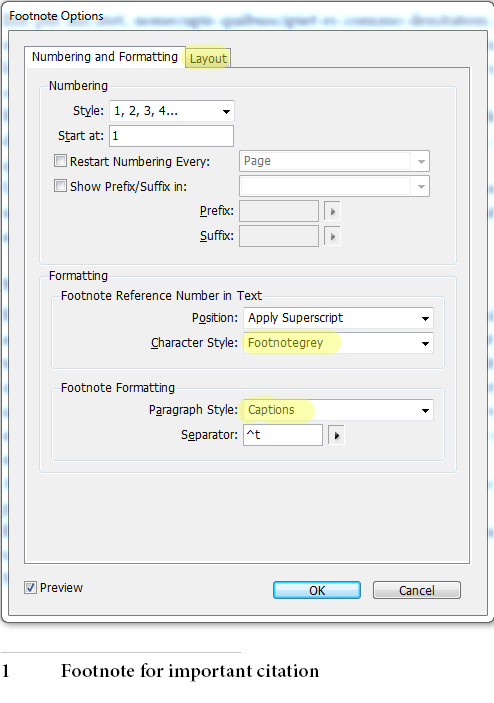
Under Type there are Document Footnote Options to make things look pretty. You will want to create a paragraph style for footnotes, and a character style can be applied to the superscript note indicator. On the Layout pane there are cosmetic options, including how the separator bar should appear.
I prefer footnotes because the reader can quickly look for the source on the same page. For those of you writing in Word and importing text in large blocks, endnotes might be more appropriate. As of Indesign CS6 there is no easy method for creating endnotes, however, so we can only hope that Adobe will add that capability in the future.
I hope some of the tips in this article will reduce the pain of finishing your thesis.
*Edit* Automatic Figure Numbers
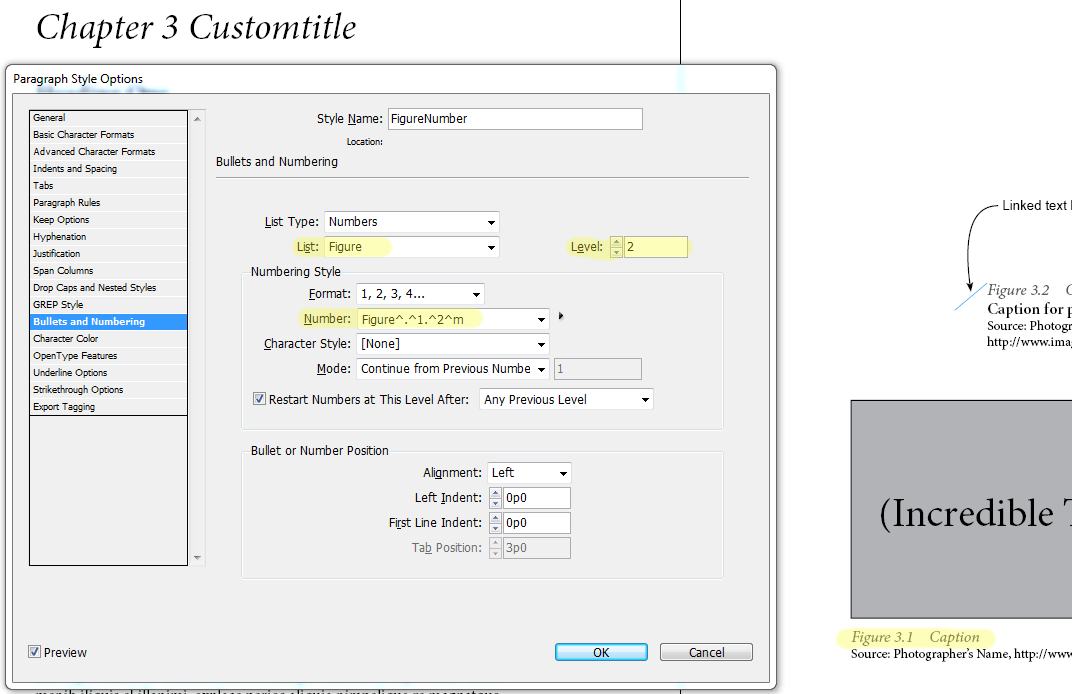
Ronald Tang dropped by and told me about another feature, you can automate the Figure numbers too! By creating a list in your paragraph style the figure numbers will be generated automatically and reflow as you shift things in your document. This trick is a bit more involved, so I’ll show you the basics and you can adapt it to your formatting.
We are going to create lists in the paragraph styles for the figure number, which indesign can automatically refresh. For a two stage figure number ie: Figure1.2 you will need to make your chapter headings a list too.
Inside your chapter title paragraph styles, head to Bullets and Numbering. Go ahead and create a list, by hitting the List drop down and naming it. You must use the same list for both chapter titles and figure numbers so chapter numbers are inherited. Under Number there is a field that controls formatting for the list. In the example below I have typed in Chapter, and the ^1 indicates Indesign will fill in a Level 1 list number. See it in action on the top of the screenshot, The highlighted portion is autogenerated, then a custom title can be typed in afterwards.
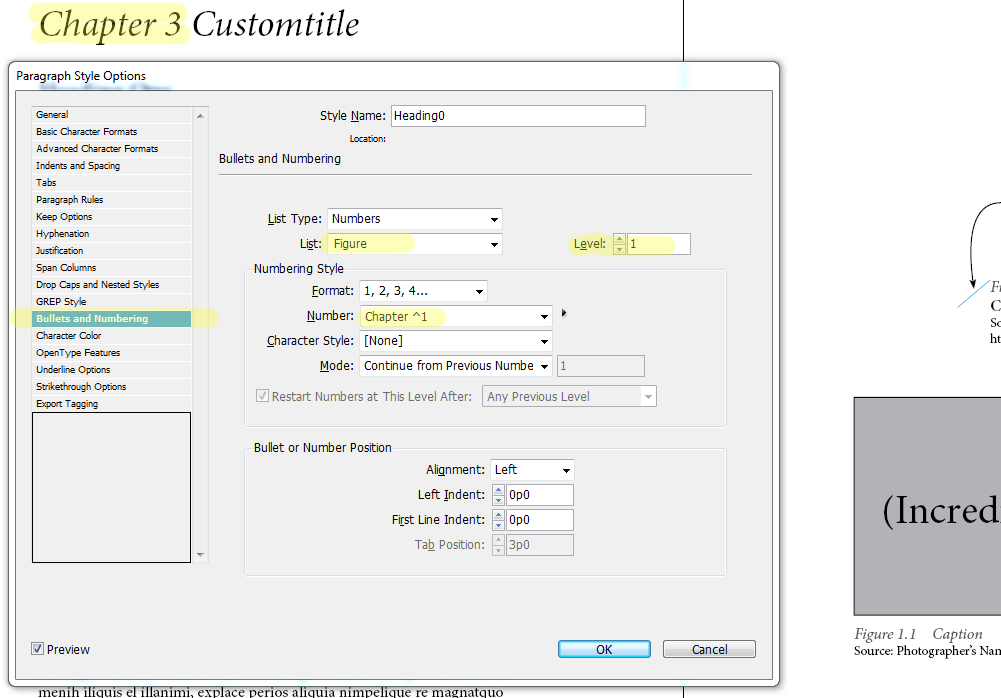
Once you have chapter titles working, we can create a numbers list for figures that pulls in the Level 1 list from each chapter and a Level 2 list for each figure. The Number box is where the magic happens. In this case I typed in Figure, then the small triangular arrow on the right permits you to add in spaces or symbols. After Figure there is a punctuation space, then a Level 1 list item, then a period, then a Level 2 list item, then an em space. Have fun fooling around with formatting in there.
Scott is a masters student completing a thesis on recyclable buildings.






1 Comment
Leave your reply.